

Collection View Cell In Storyboard Is Registered Already?
This browser is no longer supported.
Upgrade to Microsoft Edge to have advantage of the latest features, security updates, and technical support.
Populating a Tabular array with Information in Xamarin.iOS
To add together rows to a UITableView yous need to implement a UITableViewSource bracket and override the methods that the tabular array view calls to populate itself.
This guide covers:
- Subclassing a UITableViewSource
- Cell Reuse
- Adding an Index
- Adding Headers and Footers
Subclassing UITableViewSource
A UITableViewSource subclass is assigned to every UITableView. The table view queries the source grade to make up one's mind how to render itself (for example, how many rows are required and the pinnacle of each row if different from the default). Most importantly, the source supplies each cell view populated with data.
There are only two mandatory methods required to make a table brandish data:
- RowsInSection – return an
nintcount of the total number of rows of information the table should display. - GetCell – return a
UITableViewCellpopulated with data for the corresponding row alphabetize passed to the method.
The BasicTable sample file TableSource.cs has the simplest possible implementation of UITableViewSource. You can run across in code snippet beneath that it accepts an array of strings to display in the table and returns a default cell style containing each string:
public grade TableSource : UITableViewSource { string[] TableItems; string CellIdentifier = "TableCell"; public TableSource (cord[] items) { TableItems = items; } public override nint RowsInSection (UITableView tableview, nint section) { return TableItems.Length; } public override UITableViewCell GetCell (UITableView tableView, NSIndexPath indexPath) { UITableViewCell cell = tableView.DequeueReusableCell (CellIdentifier); string particular = TableItems[indexPath.Row]; //if there are no cells to reuse, create a new one if (cell == null) { cell = new UITableViewCell (UITableViewCellStyle.Default, CellIdentifier); } cell.TextLabel.Text = item; return jail cell; } } A UITableViewSource can use any data structure, from a elementary string assortment (as shown in this example) to a Listing <> or other collection. The implementation of UITableViewSource methods isolates the table from the underlying data structure.
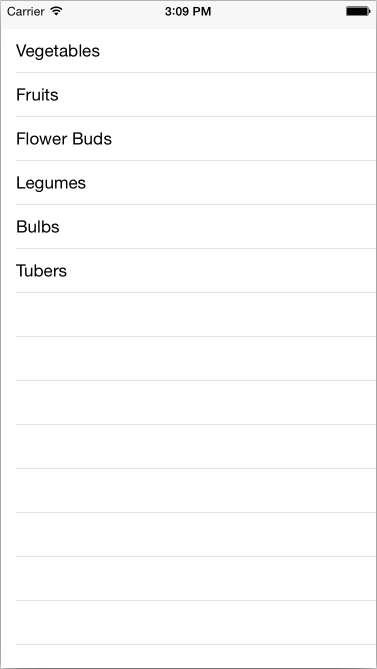
To use this bracket, create a string assortment to construct the source so assign it to an instance of UITableView:
public override void ViewDidLoad () { base.ViewDidLoad (); table = new UITableView(View.Bounds); // defaults to Patently style string[] tableItems = new string[] {"Vegetables","Fruits","Blossom Buds","Legumes","Bulbs","Tubers"}; table.Source = new TableSource(tableItems); Add (table); } The resulting table looks like this:
Most tables allow the user to bear upon a row to select it and perform some other activeness (such equally playing a song, or calling a contact, or showing another screen). To achieve this, there are a few things we demand to do. First, allow'southward create an AlertController to brandish a bulletin when the user click on a row by adding the following to the RowSelected method:
public override void RowSelected (UITableView tableView, NSIndexPath indexPath) { UIAlertController okAlertController = UIAlertController.Create ("Row Selected", tableItems[indexPath.Row], UIAlertControllerStyle.Alarm); okAlertController.AddAction(UIAlertAction.Create("OK", UIAlertActionStyle.Default, null)); ... tableView.DeselectRow (indexPath, true); } Adjacent, create an instance of our View Controller:
HomeScreen possessor; Add a constructor to your UITableViewSource class which takes a view controller as a parameter and saves information technology in a field:
public TableSource (string[] items, HomeScreen owner) { ... this.owner = possessor; } Modify the ViewDidLoad method where the UITableViewSource class is created to pass the this reference:
table.Source = new TableSource(tableItems, this); Finally, dorsum in your RowSelected method, telephone call PresentViewController on the buried field:
public override void RowSelected (UITableView tableView, NSIndexPath indexPath) { ... possessor.PresentViewController (okAlertController, truthful, aught); ... } At present the user can touch a row and an alert will appear:

Jail cell Reuse
In this example there are only six items, so at that place is no cell reuse required. When displaying hundreds or thousands of rows, even so, it would exist a waste of retentiveness to create hundreds or thousands of UITableViewCell objects when only a few fit on the screen at a fourth dimension.
To avoid this state of affairs, when a cell disappears from the screen its view is placed in a queue for reuse. Every bit the user scrolls, the table calls GetCell to asking new views to display – to reuse an existing jail cell (that is not currently being displayed) simply phone call the DequeueReusableCell method. If a jail cell is available for reuse it will be returned, otherwise a null is returned and your code must create a new prison cell case.
This snippet of code from the example demonstrates the pattern:
// request a recycled jail cell to salve retention UITableViewCell jail cell = tableView.DequeueReusableCell (cellIdentifier); // if there are no cells to reuse, create a new one if (cell == cypher) prison cell = new UITableViewCell (UITableViewCellStyle.Default, cellIdentifier); The cellIdentifier effectively creates dissever queues for different types of cell. In this case all the cells wait the same so but one hardcoded identifier is used. If there were unlike types of cell they should each have a different identifier string, both when they are instantiated and when they are requested from the reuse queue.
Cell Reuse in iOS 6+
iOS six added a cell reuse pattern like to the one introduction with Collection Views. Although the existing reuse pattern shown in a higher place is still supported for backwards compatibility, this new blueprint is preferable as information technology removes the need for the cipher check on the cell.
With the new pattern an application registers the cell grade or xib to exist used by calling either RegisterClassForCellReuse or RegisterNibForCellReuse in the controller'south constructor. So, when dequeueing the prison cell in the GetCell method, merely phone call DequeueReusableCell passing the identifier you registered for the cell course or xib and the index path.
For instance, the post-obit code registers a custom cell form in a UITableViewController:
public course MyTableViewController : UITableViewController { static NSString MyCellId = new NSString ("MyCellId"); public MyTableViewController () { TableView.RegisterClassForCellReuse (typeof(MyCell), MyCellId); } ... } With the MyCell class registered, the prison cell can be dequeued in the GetCell method of the UITableViewSource without the demand for the extra null check, equally shown below:
class MyTableSource : UITableViewSource { public override UITableViewCell GetCell (UITableView tableView, NSIndexPath indexPath) { // if cell is not available in reuse pool, iOS volition create 1 automatically // no need to do null cheque and create cell manually var prison cell = (MyCell) tableView.DequeueReusableCell (MyCellId, indexPath); // do whatsoever you need to with jail cell, such every bit assigning backdrop, etc. return cell; } } Be aware, when using the new reuse pattern with a custom cell class, you need to implement the constructor that takes an IntPtr, equally shown in the snippet beneath, otherwise Objective-C won't exist able to construct an case of the cell class:
public class MyCell : UITableViewCell { public MyCell (IntPtr p):base(p) { } ... } You can see examples of the topics explained higher up in the BasicTable sample linked to this article.
Calculation an Index
An index helps the user scroll through long lists, typically ordered alphabetically although you tin index by whatever criteria you wish. The BasicTableIndex sample loads a much longer list of items from a file to demonstrate the index. Each item in the alphabetize corresponds to a 'section' of the table.

To support 'sections' the information backside the tabular array needs to be grouped, then the BasicTableIndex sample creates a Dictionary<> from the array of strings using the kickoff letter of each item as the dictionary primal:
indexedTableItems = new Lexicon<string, List<string>>(); foreach (var t in items) { if (indexedTableItems.ContainsKey (t[0].ToString ())) { indexedTableItems[t[0].ToString ()].Add(t); } else { indexedTableItems.Add (t[0].ToString (), new List<cord>() {t}); } } keys = indexedTableItems.Keys.ToArray (); The UITableViewSource subclass and then needs the post-obit methods added or modified to utilise the Dictionary<> :
- NumberOfSections – this method is optional, past default the table assumes ane section. When displaying an index this method should render the number of items in the index (for instance, 26 if the index contains all the messages of the English alphabet).
- RowsInSection – returns the number of rows in a given department.
- SectionIndexTitles – returns the array of strings that will be used to brandish the index. The sample code returns an array of letters.
The updated methods in the sample file BasicTableIndex/TableSource.cs look like this:
public override nint NumberOfSections (UITableView tableView) { return keys.Length; } public override nint RowsInSection (UITableView tableview, nint section) { return indexedTableItems[keys[section]].Count; } public override string[] SectionIndexTitles (UITableView tableView) { return keys; } Indexes are generally merely used with the Plain tabular array style.
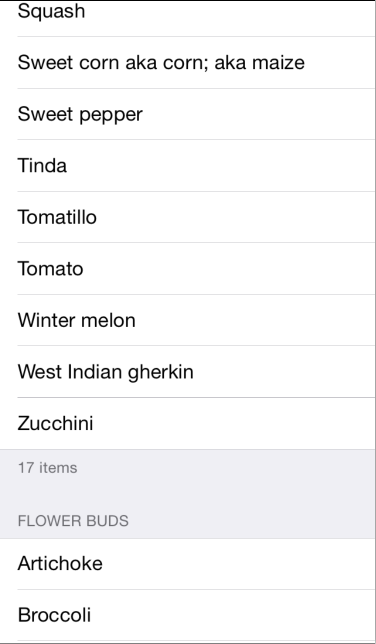
Headers and footers tin can be used to visually grouping rows in a table. The data construction required is very like to adding an index – a Dictionary<> works really well. Instead of using the alphabet to group the cells, this example will grouping the vegetables by botanical type. The output looks like this:
To display headers and footers the UITableViewSource bracket requires these boosted methods:
- TitleForHeader – returns the text to utilise equally the header
- TitleForFooter – returns the text to use as the footer.
The updated methods in the sample file BasicTableHeaderFooter/Code/TableSource.cs expect similar this:
public override string TitleForHeader (UITableView tableView, nint section) { return keys[department]; } public override cord TitleForFooter (UITableView tableView, nint section) { return indexedTableItems[keys[section]].Count + " items"; } You can further customize the appearance of the header and footer with a View object, using the GetViewForHeader and GetViewForFooter method overrides on UITableViewSource.
- WorkingWithTables (sample)

Collection View Cell In Storyboard Is Registered Already?,
Source: https://docs.microsoft.com/en-us/xamarin/ios/user-interface/controls/tables/populating-a-table-with-data
Posted by: kellambligh1991.blogspot.com
0 Response to "Collection View Cell In Storyboard Is Registered Already?"
Post a Comment